

DLMS Meter
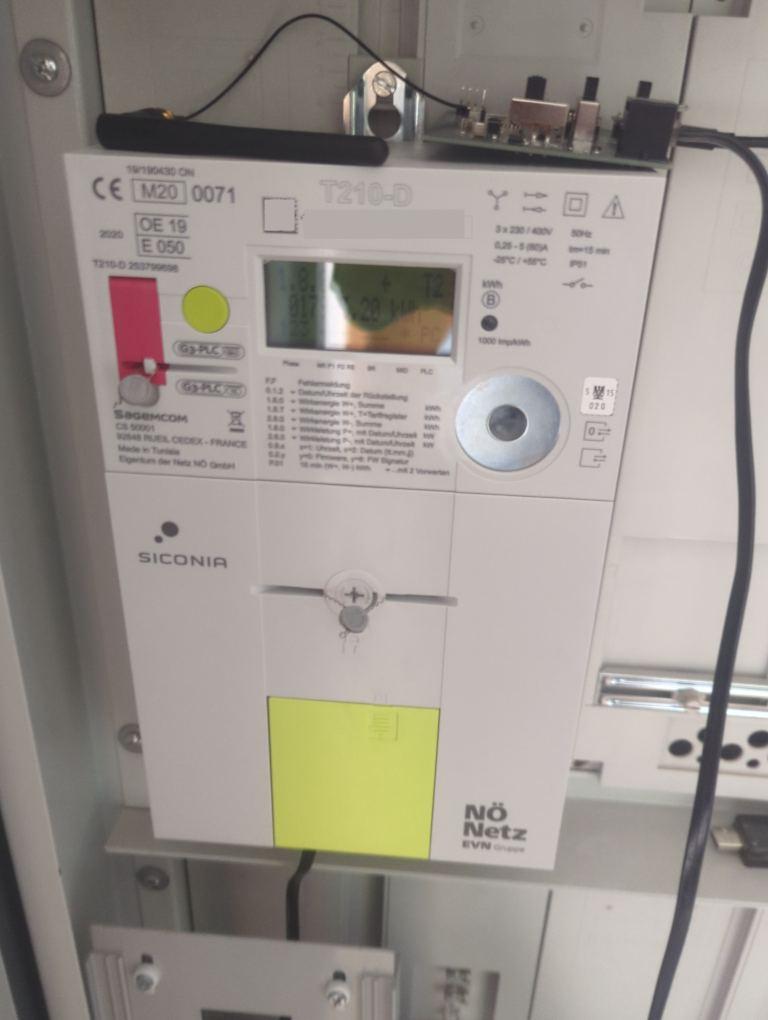
The dlms_meter component connects to smart meters which use the DLMS/COSEM protocol in PUSH mode over UART.
These smart meters are widely deployed globally.
The component does not transmit data to the meter. The meter periodically broadcasts frames. ESPHome listens, decodes (and decrypts if necessary), and updates the configured sensors as data arrives.
NOTE
- Hardware adapter: An adapter (like an M-Bus to UART module) is required to connect the ESP board to the smart meter.
- ESP Board: An ESP32 is strongly recommended. ESP8266 boards are unsuitable for large or multi-frame DLMS telegrams and may result in truncated or corrupted frames.
- Encryption: For encrypted meters, you must request a 32-character hexadecimal decryption key from your energy provider.
Configuration
Section titled “Configuration”This component requires a UART bus to be configured.
TIP
The UART configuration depends on your specific meter hardware. Be sure to consult your provider or meter’s specifications.
dlms_meter:  id: dlms_meter_hub  uart_id: uart_dlms_bus
sensor:  - platform: dlms_meter    dlms_meter_id: dlms_meter_hub    obis_code: "1.0.1.7.0.255"    name: "Active power taken from grid"
Configuration Variables
Section titled “Configuration Variables”- id (Optional, ID): The ID of the
dlms_metercomponent. - uart_id (Optional, ID): The ID of the UART component that is connected to the smart meter.
- receive_timeout (Optional, Time): The timeout for receiving a complete frame. Defaults to
1000ms. - decryption_key (Optional, string): Specify if your smart meter uses encryption. You should request this key from your electricity provider (32 hex characters, case-insensitive).
- auth_key (Optional, string): Authentication key. Specify if your smart meter uses encryption with
authentication. You should request this key from your electricity provider. Used for
General-GLO-CipheringandGeneral-DED-CipheringAPDUs. - skip_crc (Optional, boolean): Skip CRC check. Some smart meters use the wrong polynomial to calculate CRC.
In such cases, you can use this flag as a workaround. Defaults to
false. - custom_patterns (Optional, list): While the
dlms_meternatively supports most devices, some meters use unique payload structures. If your meter’s data isn’t being read correctly, use this field to define a custom AXDR descriptor pattern that tells the system how to parse the incoming data.
Multiple Meters
Section titled “Multiple Meters”One device can read several meters. Add one dlms_meter entry per meter, each with its own id and its own
UART bus; two meters cannot share a UART. The example below expects two UART buses with the IDs
uart_meter_1 and uart_meter_2. Then set dlms_meter_id on every sensor, text sensor and binary sensor to choose
the meter it reads from.
dlms_meter:  - id: meter_1    uart_id: uart_meter_1  - id: meter_2    uart_id: uart_meter_2
sensor:  - platform: dlms_meter    dlms_meter_id: meter_1    obis_code: "1.0.1.7.0.255"    name: "Meter 1 Active power"  - platform: dlms_meter    dlms_meter_id: meter_2    obis_code: "1.0.1.7.0.255"    name: "Meter 2 Active power"
Each meter keeps its own receive buffer of about 2 KB, so check the free RAM when reading many meters.
Platforms
Section titled “Platforms”Sensor, Text Sensor, and Binary Sensor
Section titled “Sensor, Text Sensor, and Binary Sensor”All platforms (sensor, text_sensor, binary_sensor) support dynamic mapping using the obis_code property.
This allows you to decode nearly any property your meter emits.
- dlms_meter_id (Optional, ID): Manually specify the ID of the
dlms_meterhub if you have multiple. - obis_code (Required for dynamic mapping, string): The OBIS code of the value you want to read. The code supports flexible formats
like
1-0:32.7.0or1.0.32.7.0.255.
When defining your sensors, it is recommended to include standard ESPHome sensor properties such as
unit_of_measurement, accuracy_decimals, device_class, and state_class.
The exact configuration will vary depending on the specific value you are reading (e.g., energy vs. power vs. voltage).
Here is an example of how to configure an energy sensor so it displays correctly with Home Assistant’s Energy Dashboard:
sensor: - platform: dlms_meter dlms_meter_id: dlms_meter_hub obis_code: "1.0.1.8.0.255" name: "Energy Consumed" unit_of_measurement: "kWh" accuracy_decimals: 3 device_class: energy state_class: total_increasingFinding Your Meter’s OBIS Codes
Section titled “Finding Your Meter’s OBIS Codes”Before using this method, it is highly recommended to check your meter’s manual or your energy provider’s documentation for a list of supported OBIS codes.
TIP
If you are building custom patterns or need to capture the raw hex payload for troubleshooting, change the dlms_meter
log level to VERY_VERBOSE. This will output the full raw buffer and the decrypted AXDR payload.
If you are configuring your meter for the first time and do not know which OBIS codes it broadcasts, you can temporarily
increase the logging level to VERBOSE. The component will print all successfully parsed OBIS codes and their values to
the ESPHome log.
logger: level: VERBOSE initial_level: DEBUG logs: dlms_meter: VERBOSEIn this configuration, the global level is set to VERBOSE because ESPHome will otherwise exclude lower-severity log
messages at compile time (any log message with a lower severity will not be shown).
WARNING
Increasing logging verbosity, for example by using VERBOSE or VERY_VERBOSE,
can impact the performance of your ESP application and increase memory size.
Always revert to default log levels for daily use.
To prevent your console from being flooded with verbose messages from every component,
initial_level restores the standard default of DEBUG dynamically at run time,
while the logs mapping manually sets the specific dlms_meter tag to remain at VERBOSE.
For more details, refer to the Logger Component.
Migrating from Legacy Keys
Section titled “Migrating from Legacy Keys”The predefined sensor keys (for example voltage_l1 or timestamp) and the provider option were removed in
2026.11.0. Replace each legacy key with an entry that sets obis_code to the code listed below, as shown in the
examples above. For sensors, the legacy keys also set the unit, accuracy, device class and state class shown in
the list, so add those to each new entry. Remove provider from the hub; for provider: netznoe, add the
custom_patterns shown under Netz NOE P1 (M-Bus) instead.
Sensors:
- voltage_l1 (
1.0.32.7.0.255;V, 1 decimal,voltage,measurement): Voltage Phase 1. - voltage_l2 (
1.0.52.7.0.255;V, 1 decimal,voltage,measurement): Voltage Phase 2. - voltage_l3 (
1.0.72.7.0.255;V, 1 decimal,voltage,measurement): Voltage Phase 3. - current_l1 (
1.0.31.7.0.255;A, 2 decimals,current,measurement): Current Phase 1. - current_l2 (
1.0.51.7.0.255;A, 2 decimals,current,measurement): Current Phase 2. - current_l3 (
1.0.71.7.0.255;A, 2 decimals,current,measurement): Current Phase 3. - active_power_plus (
1.0.1.7.0.255;W, 0 decimals,power,measurement): Active power taken from grid. - active_power_minus (
1.0.2.7.0.255;W, 0 decimals,power,measurement): Active power put into grid. - active_energy_plus (
1.0.1.8.0.255;Wh, 0 decimals,energy,total_increasing): Cumulative active energy taken from grid. - active_energy_minus (
1.0.2.8.0.255;Wh, 0 decimals,energy,total_increasing): Cumulative active energy exported to grid. - reactive_energy_plus (
1.0.3.8.0.255;Wh, 0 decimals,energy,total_increasing): Reactive energy taken from grid. - reactive_energy_minus (
1.0.4.8.0.255;Wh, 0 decimals,energy,total_increasing): Reactive energy exported to grid. - power_factor (
1.0.13.7.0.255; no unit, 3 decimals,power_factor,measurement): Power factor.
Text Sensors:
- timestamp (
0.0.1.0.0.255): Timestamp included in the received frame. - meternumber (
0.0.96.1.0.255): Meter number reported by the device.
Advanced Configuration
Section titled “Advanced Configuration”Advanced Configuration Example
Section titled “Advanced Configuration Example”This example demonstrates how to use the optional configuration variables for encrypted meters or those requiring custom parsing patterns.
dlms_meter: id: dlms_meter_hub uart_id: uart_dlms_bus receive_timeout: 50ms decryption_key: "00112233445566778899AABBCCDDEEFF" auth_key: "00112233445566778899AABBCCDDEEFF" skip_crc: false custom_patterns: - pattern: "TO, TV" name: "flat OBIS + value pairs" priority: 15 default_obis: "1.0.96.1.0.255"Custom Patterns
Section titled “Custom Patterns”You can define a custom pattern simply by passing its pattern string, or by defining an object with additional properties:
- pattern (Required, string): The DSL-based pattern string (e.g.,
"TO, TV"). - name (Optional, string): A name for the pattern.
- priority (Optional, int): The priority of the pattern (lower number is tried first). Defaults to
0. - default_obis (Optional, string): The fallback OBIS code to use if the pattern captures no OBIS code. Requires
name to be set. Formatted like
1-0:96.1.0or1.0.96.1.0.255.
Built-in Patterns
Section titled “Built-in Patterns”The dlms_meter component loads several built-in patterns by default. Built-in patterns start at priority 10.
Your custom patterns will be evaluated alongside these based on their configured priority.
| Name | Priority | Typical use |
|---|---|---|
SelfDescribing | 10 | definitions array + values |
classId-taggedObis-scaler-value | 20 | class ID, tagged OBIS, scaler, value |
taggedObis-value-scalerUnit | 30 | tagged OBIS, value, scaler-unit structure |
value-classId-scalerUnit-taggedObis | 40 | value first, class ID, scaler-unit, OBIS |
zpaAidon-untaggedLayout | 50 | untagged ZPA/Aidon-style layouts |
structuredObis-value-scalerUnit | 60 | OBIS, value, scaler-unit structure |
structuredObis-value | 70 | OBIS and value structure |
flatObis-valuePair | 80 | flat OBIS + value pairs |
firstElement-dateTime | 90 | first-element date-time structure |
swappedTagObis-value-scalerUnit | 100 | swapped-tag OBIS, value, scaler-unit |
Common Custom Pattern Examples
Section titled “Common Custom Pattern Examples”Here are some common structures you might encounter on less standard meters:
NOTE
Many of these are now covered by default built-ins, but can be customized further
dlms_meter: # ... custom_patterns: - pattern: "TC, TO, TDTM" name: "datetime value" - pattern: "C, O, A, V, TS, TU" name: "untagged flat" - pattern: "TO, TV, S(TS, TU)" name: "tagged with scaler-unit" - pattern: "TO, TV" name: "flat OBIS + value pairs (no scaler)" - pattern: "L, TSTR" name: "last element as string" - pattern: "TOW, TV, TSU" name: "Landis+Gyr swapped OBIS"Token Reference for Patterns
Section titled “Token Reference for Patterns”| Token | Meaning | Hex example |
|---|---|---|
F | first element guard | position check only |
L | last element guard | position check only |
C | class ID, 2-byte uint16 without tag | 00 03 |
TC | tagged class ID | 12 00 03 |
O | OBIS code, 6-byte octet string without tag | 01 00 01 08 00 FF |
TO | tagged OBIS code | 09 06 01 00 01 08 00 FF |
TOW | tagged OBIS with swapped tag bytes | 06 09 01 00 1F 07 00 FF |
A | attribute index, 1-byte uint8 without tag | 02 |
TA | tagged attribute | 11 02 or 0F 02 |
V / TV | generic value | 06 00 00 07 A4 |
TSTR | tagged string-like value | 09 08 38 34 38 39 35 31 32 36 |
TDTM | tagged 12-byte date-time value | 19 ... or 09 0C ... |
TS | tagged scaler | 0F FF |
TU | tagged unit enum | 16 23 |
TSU | tagged scaler-unit pair | 02 02 0F FF 16 23 |
S(x, y, ...) | inline sub-structure | 02 03 |
DN | descend into nested structure | control token |
UP | return from nested structure | control token |
Supported Meters
Section titled “Supported Meters”IMPORTANT
Always check if your meter reading already works natively with the default settings
before adding any custom_patterns. The component’s built-in parser handles many standard meters automatically.
Natively Supported (No Custom Configuration Required)
Section titled “Natively Supported (No Custom Configuration Required)”The vast majority of standard-compliant smart meters are supported right out of the box. If your meter follows the official DLMS specifications, you generally only need to provide the UART pins and your desired OBIS codes.
We have explicitly tested and confirmed native support for standard meters including (but not limited to):
Sagemcom XT211, Energomera, Kaifa MA304H3E, Salzburg Netz, Iskra 550, and Norway HAN (Aidon 1-phase and 3-phase).
Specific Meter Configurations
Section titled “Specific Meter Configurations”Some manufacturers implement the DLMS standard using non-standard object structuring or framing. Below are the tested configuration parameters required for these specific meters:
Landis+Gyr ZMF100 : This specific meter sends invalid Frame Check Sequences (FCS) and requires skipping the CRC check. (Custom parsing patterns are natively supported)
dlms_meter: # ... skip_crc: trueLandis+Gyr E450 : This meter uses encryption and requires a decryption key from your provider.
dlms_meter: # ... decryption_key: "YOUR_32_CHAR_HEX_KEY" custom_patterns: - pattern: "F, TDTM" name: "DateTime"Kamstrup Omnipower : This meter uses encryption. Some regional variants also mandate an Authentication Key.
dlms_meter: # ... decryption_key: "YOUR_32_CHAR_HEX_KEY" auth_key: "YOUR_32_CHAR_AUTH_KEY" # Add if required by your provider custom_patterns: - pattern: "F, TSTR" name: "Obis List Ver"Netz NOE P1 (M-Bus) : Requires encryption. The MeterID is untagged and requires a fallback default OBIS mapping.
dlms_meter: # ... decryption_key: "YOUR_32_CHAR_HEX_KEY" custom_patterns: - pattern: "L, TSTR" name: "MeterID" default_obis: "0.0.96.1.0.255" - pattern: "F, TDTM" name: "DateTime" default_obis: "0.0.1.0.0.255"KAIFA MA309M : Requires the custom patterns below to decode the Meter ID and timestamp correctly. Note: this meter does not emit reactive power, power factor, or frequency.
dlms_meter: # ... decryption_key: "YOUR_32_CHAR_HEX_KEY" custom_patterns: - pattern: "L, TSTR" name: "MeterID" default_obis: "0.0.96.1.0.255" - pattern: "F, TDTM" name: "DateTime" default_obis: "0.0.1.0.0.255"(Additional instructions and specific custom_patterns for meters from manufacturers can be added here
as users report the specific setups required for their unique smart meter firmware.)